Background
1. Technical field
This disclosure relates generally to orthopedic implants and, more specifically, to identification of landmarks disposed on orthopedic implants.
2. Description of the related art
The development of the interlocking femoral nail has significantly widened the scope for intramedullary (IM) fixation of long bone fractures. Locking an IM nail makes the construct more stable longitudinally and stops rotation of the nail within the bone. A typical IM nail fixation surgery involves a combination of jigs, x-ray imaging, and manual "eye-balling" to locate and drill the distal screw holes.
In this surgical procedure, an IM nail is hammered into the canal of a fractured long bone in order to fixate the fractured ends together. Typically, the proximal locking is performed first and is usually carried out with a jig. Nail deformation during intramedullary insertion, however, may make a jig inaccurate for the distal screws. The primary difficulty lies in the positioning of the distal locking screws and alignment of the drill for the drilling of the distal screw holes because it is the most time consuming and challenging step of the overall implantation procedure. Consequently, the two main reasons for failure in distal locking are incorrect entry point on the bone and wrong orientation of the drill. If either of these two factors is wrong, then the drill will not go through the nail hole.
An inaccurate entry point also compounds the problem as the rounded end of the drill bit often slips, and it is then difficult to place another drill hole next to the earlier one. Inaccurate distal locking may lead to premature failure with breakage of the nail through the nail hole, breakage of the screw, or the breaking of the drill bit within the bone.
Manual techniques are the most common and accepted techniques for sighting the distal screw holes and predominate the orthopedic industry. The majority of distal targeting techniques employ a bushing (cylindrical sleeve) that guides the drill. The mechanism of aligning the guide bushing and keeping it in place differs. There are cases where the surgeons use a half sleeve (bushing cut in half longitudinally) or a full sleeve to help steady the drill bit during drilling. In either situation, the surgeon will incise the patient and insert the drill through the incision. The manual techniques are based primarily on the surgeon's manual skill and make use of radiographic x-ray imaging and mechanical jigs.
Another method for achieving this on long nails is by using a technique called "perfect circles" with the aid of a C-arm. This is where one orients the patient and the C-arm such that when viewing the implant fluoroscopically the hole with which the screw is to pass appears to be in the shape of a circle. If the C-arm is not perpendicular to the hole then it would appear oblong or even absent.
Therefore, a need exists in the art for a system and method for more accurately targeting a "landmark," target or readily identifiable feature disposed on a medical implant for more accurate placement of the medical implant and/or for interlocking, coupling or connecting one medical implant with another medical implant. Further, there remains a need in the art for accurately positioning the distal locking screws and aligning the drill for the drilling of the distal screw holes of interlocking IM nails.
Summary of the disclosure
Various systems for identifying landmarks are disclosed. One disclosed system may comprise a field generator for generating a magnetic field; an orthopedic implant located within the magnetic field, the orthopedic implant having at least one landmark; a removable probe with a first magnetic sensor spaced apart from the at least one landmark; a landmark identifier having a second magnetic sensor; and a processor for comparing sensor data from the first and second sensor and using the set distance to calculate the position of the landmark identifier relative to the at least one landmark.
Another disclosed system for identifying a landmark may comprise: a field generator for generating a magnetic field; an orthopedic implant located within the magnetic field, the orthopedic implant having at least one landmark and a longitudinal groove with a proximal end portion and a distal end portion; a first magnetic sensor mounted to the orthopedic implant at the distal end portion of the longitudinal groove and spaced apart from the at least one landmark a set distance; a landmark identifier having a second magnetic sensor; and a processor for comparing sensor data from the first and second sensor and using the set distance to calculate the position of the landmark identifier relative to the at least one landmark.
In a refinement, the landmark may be any readily identifiable feature or element. For example, the landmark may be selected from the group consisting of a structure, a void, a boss, a channel, a detent, a flange, a groove, a member, a partition, a step, an aperture, a bore, a cavity, a dimple, a duct, a gap, a notch, an orifice, a passage, a slit, a hole, or a slot.
In a refinement, the orthopedic implant may be an intramedullary nail.
In a refinement, the orthopedic implant may have an outer surface, an inner surface forming a cannulation, and a wall therebetween, and the first magnetic sensor may be mounted within the wall.
In a refinement, the orthopedic implant may further include a pocket and the first sensor is located within a received within the pocket.
In a refinement, the orthopedic implant may further include a cover.
In a refinement, the orthopedic implant may further include a second opening adapted to receive a cover.
In a refinement, the orthopedic implant may further include a circumferential pocket.
In a refinement, the system may include a lead coupled to the first magnetic sensor.
In a refinement, the system may include an insertion handle removably coupled to the orthopedic implant.
In a refinement, the insertion handle may include a sensor.
In a refinement, the system may include a monitor electrically coupled to the processor.
In a refinement, the system may include a removable lead coupled to the first sensor.
In a refinement, the longitudinal groove may be disposed along an outer surface of the implant.
In a refinement, the orthopedic implant may also include a cannulation, and the longitudinal groove is generally adjacent the cannulation.
In a refinement, the landmark identifier may include a drill sleeve.
In a refinement, the landmark identifier may also include a serrated tip.
In a refinement, the landmark identifier may also include a tube.
In a refinement, the landmark identifier may also include a marking sensor.
In a refinement, the landmark identifier may also include a handle.
In a refinement, the field generator may be incorporated into the landmark identifier.
In a refinement, the processor may provide feedback information to a user.
Another disclosed system for identifying a landmark may comprise: a field generator for generating a magnetic field; an orthopedic implant located within the magnetic field, the orthopedic implant having at least one landmark; a magnet mounted to the orthopedic implant and spaced apart from the at least one landmark a set distance; a landmark identifier having a magnetic sensor; and a processor for comparing sensor data from the magnetic sensor and using the set distance to calculate the position of the landmark identifier relative to the at least one landmark.
A method for identifying a landmark is also disclosed that may comprise: providing an orthopedic implant assembly having an orthopedic implant with a longitudinal groove and a removable lead having a magnetic sensor attached thereto situated within the longitudinal groove, the orthopedic implant having a proximal end portion, a distal end portion, and at least one landmark on the distal end portion; implanting the orthopedic implant assembly in a patient; first installing transfixion elements in the proximal end portion; identifying the at least one landmark using a landmark identifier; installing a transfixion element in the at least one landmark in the distal end portion after first installing transfixion elements in the proximal end portion; and removing the removable lead.
A graphical user interface is also disclosed that may comprise: a first portion indicating drill depth relative to an implant; and a second portion indicating landmark identifier position relative to a landmark located on the implant.
The disclosed systems, methods and interface have several advantages over prior devices and techniques. First, the disclosed systems operate independently of fluoroscopy and eliminate the necessity of X-ray devices for targeting of transfixion elements, thereby reducing the exposure of users and patients to radiation. Second, the disclosed systems allow a user to lock the driving-end before locking the non-driving end. In other words, the disclosed systems do not require use of an implant cannulation and allows for proximal locking prior to distal locking, in some embodiments.
Further features, aspects, and advantages of the disclosed systems, methods and interfaces, as well as the structure and operation of various refinements thereof, are described in detail below with reference to the accompanying drawings.
Brief description of the drawings
For a more complete understanding of the disclosed methods and apparatuses, reference should be made to the exemplary embodiments illustrated in greater detail in the accompanying drawings, wherein:
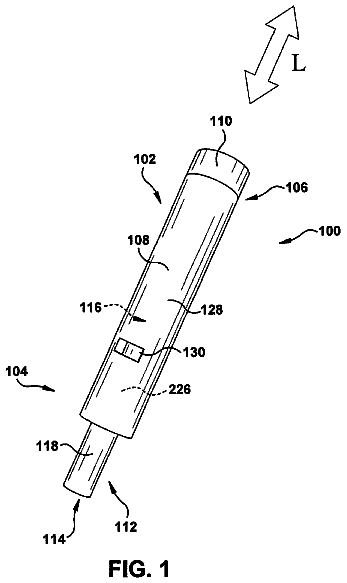
FIG. 1 illustrates a disclosed system for identifying landmarks;
FIG. 2 is a sectional view of the orthopedic implant assembly shown in FIG. 1;
FIG. 3 illustrates a sensor mounting for the orthopedic implant assembly illustrated in FIGS. 1-2;
FIG. 4 illustrates another disclosed sensor mounting for the orthopedic implant assembly illustrated in FIGS. 1-2;
FIG. 5 illustrates the sensor shown in FIG. 4;
FIG. 6 illustrates another disclosed orthopedic implant assembly;
FIG. 7 is a front view of a removable lead for the orthopedic implant assembly illustrated in FIG. 6;
FIG. 8 is a top view of the orthopedic implant assembly shown in FIG. 6;
FIG. 9 illustrates a landmark identifier as disclosed in FIG. 1;
FIG. 9A illustrates another disclosed landmark identifier that is contained within a common housing with field generator and that may be hand-held;
FIG. 10 is a sectional view illustrating disclosed point contacts for the orthopedic implant assembly illustrated in FIGS. 1-2;
FIG. 11 is a sectional view illustrating additional disclosed point contacts for the orthopedic implant assembly illustrated in FIGS. 1-2;
FIG. 12A is a sectional view illustrating a disclosed crimp electrical connection for the orthopedic implant assembly illustrated in FIGS. 1-2;
FIG. 12B is a schematic view illustrating another disclosed electrical connection for the orthopedic implant assembly illustrated in FIGS. 1-2;
FIG. 12C is a schematic view illustrating a side view of the electrical connection shown in FIG. 12B;
FIG. 12D is an exploded view illustrating yet another disclosed electrical connection;
FIG. 13A is a partial perspective and exploded view illustrating another mechanism for aligning the orthopedic implant and the insertion handle;
FIG. 13B is a partial perspective and exploded view illustrating another mechanism for aligning the orthopedic implant and the electrical connection;
FIG. 14 illustrates one disclosed connection between the insertion handle and the orthopedic implant;
FIG. 15 illustrates another disclosed system for identifying landmarks;
FIG. 16 is a schematic illustration of view selection criteria;
FIG. 17 is a flowchart illustrating the step of view selection;
FIG. 18 is a schematic illustrating a disclosed method of aligning a landmark identifier;
FIG. 19 is a schematic illustrating a disclosed method of aligning a landmark identifier;
FIG. 20 illustrates a monitor with exemplary views;
FIG. 21 illustrates another disclosed landmark identifier;
FIG. 22 is a partial view of another disclosed insertion handle;
FIG. 23 illustrates another disclosed system for identifying landmarks;
FIG. 24 is a partial view of another disclosed insertion handle;
FIG. 25 illustrates yet another disclosed system for identifying landmarks;
FIG. 26 is a partial cross-sectional view of the intramedullary nail shown in FIG. 25;
FIG. 27 illustrates a disclosed packaging for the intramedullary nail shown in FIGS. 25-26;
FIG. 28 illustrates a disclosed method for connecting a disclosed system to a network;
FIG. 29 illustrates yet another disclosed system for identifying a landmark;
FIG. 30 is a flowchart illustrating a disclosed method of using the disclosed systems for identifying landmarks;
FIG. 31 is another flowchart illustrating another disclosed method for using the disclosed systems for identifying landmarks;
FIG. 32 illustrates a disclosed device for tracking drill depth;
FIGS. 33A and 33B illustrate another disclosed device for tracking drill depth;
FIG. 34 illustrates yet another disclosed device for tracking drill depth;
FIG. 35 illustrates another disclosed insertion handle;
FIG. 36 is a top perspective view of an adjustable stop;
FIG. 37 is a bottom perspective view of the adjustable stop shown in FIG. 36;
FIG. 38 is a flowchart that illustrates a disclosed method of calibrating the disclosed systems for locating landmarks.
It should be understood that the drawings are not necessarily to scale and that the disclosed embodiments are sometimes illustrated diagrammatically and in partial views. In certain instances, details which are not necessary for an understanding of the disclosed methods and apparatuses or which render other details difficult to perceive may have been omitted. It should be understood, of course, that this disclosure is not limited to the particular embodiments illustrated herein.
Detailed description of the presently preferred embodiments
Referring to the accompanying drawings in which like reference numbers indicate like elements, FIG. 1 illustrates one disclosed system 10 for identifying landmarks. The system 10 may include a processor 12, a magnetic field generator 16, a landmark identifier 18, and an orthopedic implant assembly 28. In some embodiments, the system 10 may also include a monitor 14 electrically coupled to the processor 12 and an insertion handle 40 removably attached to the orthopedic implant assembly 28. The processor 12 is depicted as a desktop computer in FIG. 1 but other types of computing devices may equally be used. As examples, the processor 12 may be a desktop computer, a laptop computer, a personal data assistant (PDA), a mobile handheld device, or a dedicated device. In the depicted embodiment, the magnetic field generator is a device available from Ascension Technology Corporation of 107 Catamount Drive, Milton Vt., U.S.A.; Northern Digital Inc. of 103 Randall Drive, Waterloo, Ontario, Canada; or Polhemus of 40 Hercules Drive, Colchester Vt., U.S.A. Of course, other generators may be used. As examples, the field generator 16 may provide a pulsed direct current electromagnetic field or an alternating current electromagnetic field. In some embodiments, the system 10 may also include a control unit (not shown) coupled to the magnetic field generator 16. The control unit controls the field generator, receives signals from small mobile inductive sensors, and communicates with the processor 12, either by wire or wirelessly. In some embodiments, the control unit may be incorporated into the processor 12 either through hardware or software.
The system 10 is a magnetic position tracking system. For illustrative purposes, the system 10 may include a magnetic field generator 16 comprised of suitably arranged electromagnetic inductive coils that serve as the spatial magnetic reference frame (i.e., X, Y, Z). The system 10 may also include small mobile inductive sensors, which are attached to the object being tracked. It should be understood that other variants could be easily accommodated. The position and angular orientation of the small mobile inductive sensors are determined from its magnetic coupling to the source field produced by magnetic field generator 16.
It is noted that the magnetic field generator 16 may generate a sequence, or set, of for example six, different spatial magnetic field shapes, or distributions, each of which is sensed by the small mobile inductive sensors. Each sequence enables a sequence of signals to be produced by the small mobile inductive sensors. Processing of the sequence of signals enables determination of position and/or orientation of the small mobile inductive sensors, and hence the position of the object to which the small mobile inductive sensor is mounted relative the magnetic coordinate reference frame which is in fixed relationship to the magnetic field generator 16. The processor 12 or the control unit uses the reference coordinate system and the sensed data to create a transformation matrix comprising position and orientation information.
The landmark identifier 18 is used to target a landmark, such as a landmark disposed on the orthopedic implant assembly 28. The landmark identifier 18 may include one or more small mobile inductive sensors. In the depicted embodiment, the landmark identifier 18 has a second sensor 20. The landmark identifier 18 may be any number of devices. As examples, the landmark identifier may be a drill guide, a drill sleeve, a drill, a drill nose, a drill barrel, a drill chuck, or a fixation element. In the embodiment depicted in FIG. 1, the landmark identifier 18 is a drill sleeve. In some embodiments, the landmark identifier may include one or more of a serrated tip 22, a tube 24, and a handle 26. The tube 24 also may be referred to as a bushing, cylinder, guide, or drilling/screw placement guide. In the depicted embodiment, the second sensor 20 is oriented relative to an axis of the tube 24, which may receive a drill. This offset of the sensor 20 from the tube 24 allows the position and orientation of the tube to be located in space in six dimensions (three translational and three angular) relative to the magnetic field generator 16 or another sensor in the system. In some embodiments, the processor 12 may need to be calibrated to adjust for the offset distance of the second sensor 20. In some embodiments, the landmark identifier 18 and the field generator 16 may be combined into a single component. For example, the field generator 16 may be incorporated within the handle 26.
The orthopedic implant assembly 28 may include an implant 30 and one or more small mobile inductive sensors. In the depicted embodiment, the orthopedic implant assembly 28 has a first sensor 32. In the embodiment depicted in FIG. 1, the implant 30 is in the form of intramedullary nail but other types of implants may be used. As examples, the implant may be an intramedullary nail, a bone plate, a hip prosthetic, or a knee prosthetic. The first sensor 32 is oriented and in a predetermined position relative to one or more landmarks on the implant 30. As examples, the landmark may any readily identifiable structure such as a void, a boss, a channel, a detent, a flange, a groove, a member, a partition, a step, an aperture, a bore, a cavity, a dimple, a duct, a gap, a notch, an orifice, a passage, a slit, a hole, or a slot. In the embodiment depicted in FIG. 1, the landmarks are transfixion holes 31. The offset of the first sensor 32 from the landmark allows the position of the landmark to be located in space in six dimensions (three translational and three angular) relative to the magnetic field generator 16 or another sensor in the system, such as the second sensor. In some embodiments, the processor may need to be calibrated to adjust for the offset distance of the first sensor 32.
The first sensor 32 and the second sensor 20 are coupled to the processor 12. This may be accomplished by wire or wirelessly. The first sensor 32 and the second sensor 20 may be a six degree of freedom sensor configured to describe the location of each sensor in three translational axes, generally called X, Y and Z and three angular orientations, generally called pitch, yaw and roll. By locating the sensor in these reference frames, and knowing the location and orientation of each sensor, the landmark identifier 18 may be located relative to the landmark on the implant 30. In one particular embodiment, the information from the sensors allows for a surgeon to plan the surgical path for fixation and properly align a drill with a blind fixation hole. In the depicted embodiment, the sensors 32, 20 are six degrees of freedom sensor from Ascension Technology Corporation of 107 Catamount Drive, Milton Vt., U.S.A.; Northern Digital Inc. of 103 Randall Drive, Waterloo, Ontario, Canada; or Polhemus of 40 Hercules Drive, Colchester Vt., U.S.A. Of course, other sensors may be used.
The first sensor 32 may be attached to the implant 30. For example, the first sensor 32 may be attached to an outer surface 37. In the embodiment depicted in FIG. 1, the implant 30 may also include a groove 34 and a pocket 36 (best seen in FIG. 2). The groove 34 and pocket 36 are located in a wall of the implant 30. In the depicted embodiment, the first sensor 32 is intended to be attached to the implant 30 and installed in a patient for the service life of the implant 30. Further, in some embodiments, the orthopedic implant assembly 28 may include a cover 38 to cover the pocket 36 and/or the groove 34. The cover 38 may be substantially flush with the external surface 37 of the implant 30. Accordingly, in some embodiments, the implant 30 may include a second opening 39 (best seen in FIG. 2) to receive the cover 38.
The first sensor 32 may be tethered to leads for communication and power. The leads, and the sensor, may be fixed to the implant 30. A lead 50 may be used to connect the first sensor 32 to the processor 12 or the control unit. The lead 50 may be made from biocompatible wire. As an example, the lead 50 may be made of DFT wire available from Fort Wayne Metals Research Products Corp., 9609 Indianapolis Road, Fort Wayne, Ind. 46809. DFT is a registered trademark of Fort Wayne Metals Research Products Corp. A first connector 52 may be used to place the lead 50 relative to the implant 30. A second connector 54 may be used to connect the lead 50 to another device, such as the processor 12, the control unit, or the insertion handle 40.
The first sensor 32 may be fixed in the pocket 36 using a range of high stiffness adhesives or polymers including epoxy resins, polyurethanes, polymethyl methacrylate, polyetheretherketone, UV curable adhesives, silicone, and medical grade cyanoacrylates. As an example, EPO-TEK 301 available from Epoxy Technology, 14 Fortune Drive, Billerica, Mass. 01821 may be used. The lead 50 may be fixed in the groove in a similar manner. These types of fixation methods do not adversely affect the performance of the electrical components. Thereafter, the cover 38 may be placed on the implant 30 and welded in-place. For example, the covers may be laser welded to the implant.
The monitor 14 may be configured to display the position and orientation of the first sensor 32 and the second sensor 20 so that the display may show a surgeon both sensor positions and orientations relative to one another. The processor 12 may send positional data, either by wire or wirelessly, to a user interface, which may graphically display the relative positions of the landmark identifier and the implant on the monitor. The view displayed on the monitor 14 may be oriented relative to the landmark identifier so that the surgeon may visualize the user interface as an extension of the landmark identifier. The user interface also may be oriented so that the surgeon may view the monitor simultaneously with the surgical field.
The insertion handle 40 may be used for installation of the orthopedic implant assembly 28 and also may be used to route the leads from the first sensor 32. For example, the insertion handle 40 may route both communication and power leads between the implant 30 and the processor 12.
In the embodiment depicted in FIG. 1, the landmark identifier 18 and the insertion handle 40 each include a communications module 21, 25 for wirelessly transmitting data from the sensor 20, 32 to the processor 12, but those skilled in the art would understand that other methods, such as by wire, may be used. In the depicted embodiment, the second connector 54 plugs into the communications module 25. Alternatively, and as is explained in greater detail below, the implant 30 and the insertion handle 40 may have mating electrical contacts that form a connection when the components are assembled such that the first sensor 32 is coupled to the communications module 25.
In some embodiments, the implant 30 may include a communications circuit and an antenna for wireless communication. Power for the first sensor 32 and/or the communications circuit may be positioned within the insertion handle 40. For example, a battery may be placed within the insertion handle 40 for transferring power to the first sensor 32 and/or other electronics. Alternatively, the communications circuit, the antenna, and the battery may be located within the insertion handle 40 and each of these may be tethered to the first sensor 32. In yet another embodiment, the implant 30 may include a coil to inductively power the communications circuit and communicate data from the first sensor 32. The power source may be a single source mode or may be a dual mode AC/DC.
In use, the orthopedic implant assembly 28 is installed in a patient. For example, in the case of internal fixation, the intramedullary nail is placed within an intramedullary canal. Optionally, the user may use transfixion elements, such as screws, to first lock the proximal end of the intramedullary nail. An operator uses the targeting device 18 and the first sensor 32 to identify the landmarks 31. For example, in the case of intramedullary nail fixation, a surgeon uses the targeting device 18 to identify the blind transfixion holes and drill through the holes for placement of a transfixion element.
FIG. 2 further illustrates the implant 30 as shown in FIG. 1. The implant 30 may include the first sensor 32, the longitudinal groove 34, the pocket 36, the cover 38, and the second opening 39. As examples, the cover 38 may be comprised of gold or titanium foil. In some embodiments, the implant 30 may include an inner surface 35 that forms a cannulation 33. The implant 30 may include the outer surface 37.
FIG. 3 illustrates a first embodiment of the first sensor 32. The first sensor 32 may include two coils cross-layered to one another and having an angle alpha.
FIGS. 4 and 5 illustrate a second embodiment of the first sensor 32. The first sensor may include two coils generally orthogonal to one another in order to establish the orientation and position in the six degrees of freedom. A first coil may be oriented along the length of the implant 30. The second coil may be oriented either wrapped around the circumference of the implant, for example in a groove, or along the radius of the implant 30. In addition, while it is preferred to have the coils perpendicular to one another, other orientations may be used, although the mathematics may be more complex. Further, the coils may be oriented spirally around the implant 30. Such an orientation may allow two coils to be placed perpendicular to each other with both coils placed along both the length of the implant and along the circumference of the implant 30.
FIGS. 6-8 illustrate a second embodiment of the orthopedic implant assembly 60. The orthopedic implant assembly 60 may include the implant 30. In the embodiment depicted in FIG. 6, the implant 30 may include landmarks in the form of transfixion holes 31. The implant 30 may include a longitudinal internal groove 66 and a removable lead 64. In the embodiment depicted in FIG. 8, a diameter of the longitudinal groove 66 is shown as intersecting with the cannulation 33; however, in other embodiments, the diameter of the longitudinal internal groove is contained between the outer surface 37 and the inner surface 35. The removable lead 64 may include the first sensor 32 at its distal end portion 65. The first sensor 32 is located a known offset from the landmarks 31. The implant in FIGS. 6-8 is comprised of biocompatible material, and may be a metal alloy or a polymer. The longitudinal groove 66 may be machined or molded in place.
In use, the implant 30 with the removable lead is installed in a patient. For example, in the case of internal fixation, the intramedullary nail is placed within an intramedullary canal. Optionally, the user may use transfixion elements, such as screws, to first lock the proximal end of the intramedullary nail. Because of the location of the longitudinal groove 66, the removable lead 64 does not interfere with first locking the proximal end of the intramedullary nail. An operator uses the targeting device 18 and the first sensor 32 to identify the landmarks 31. For example, in the case of intramedullary nail fixation, a surgeon uses the targeting device 18 to identify the blind transfixion holes and drill through the holes for placement of a transfixion element. After the implant 30 is secured, the operator removes the removable lead 64 and it may be discarded.
FIG. 9 one particular embodiment of the landmark identifier 18 as shown in FIG. 1. In the depicted embodiment, the landmark identifier 18 may include the sensor 20, the serrated tip 22, the tube 24, and the handle 26. A drill 90 has markings 92 that interact with a marking sensor 19 adjacent the tube 24. The interaction is similar to a pair of digital measuring calipers in that the position between marking 92 and sensor 19 equate to a distance. This distance can be used to determine the depth of the drill into the bone and ultimately the length of the bone screw that will be inserted into the drilled hole. Distance, or drill depth, readings are only obtainable when the sensors 92 and 19 are in close proximity to each other, i.e. the drill 90 is inside the tube 24. Exemplary measurement devices are shown in U.S. Pat. No. 6,675,491 issued on Jan. 13, 2004 to Sasaki et al. and in U.S. Pat. No. 7,253,611 issued on Aug. 7, 2007 to Me et al., each of which is incorporated by reference. In the depicted embodiment, the marking sensor 19 is coupled to the communications module 21. Alternatively, the marking sensor 19 may be connected by wire to the processor 12. In FIG. 9, the communications module 21 may include a third connector 23 for electrical connection to the processor 12. Additional embodiments of the landmark identifier are shown in FIGS. 32-34.
FIG. 9A illustrates an embodiment combining a landmark identifier and a field generator. In the exemplary embodiment, the handheld landmark identifier 2016 houses an electromagnetic field generator (not shown) which includes one or more induction coils or other elements mounted in or on a preferably autoclavable material and encapsulated in a preferably silicone housing body 2018 to create a suitable electromagnetic field or fields. Such coils or elements can be oriented and disposed in the landmark identifier 2016 in a manner that is conventional in the art. The relative orientation and position of the induction coils or elements in the landmark identifier 2016 are preferably selected to optimize the balance between the qualities and strength of the electromagnetic field or fields and their interaction with the sensor and the weight, size, form factor and ergonomics of the identifier 2016. Preferably at least three induction coils are mounted in or on the autoclavable material. The particular landmark identifier 2016 shown in FIG. 9A further includes a removable sleeve attachment 2020, a sleeve 2022, and a serrated tip 2024, though different components and constructions can be included as mentioned elsewhere in this document (see, for example, 82 above). The sleeve attachment 2020 and the sleeve 2022 can be formed as a single unit or as separate units coupled to each other by adhesives or other connection means known to one skilled in the art. For illustration purposes, the sleeve 2022 as shown in FIG. 9A is a drill sleeve, but it can also be a larger size sleeve such as a screw driver sleeve or other sleeves as selected by the surgeon, or other components as disclosed, for example, in 85 above. To change sleeves or other components, the surgeon unscrews the sleeve attachment and replaces it with another sleeve attachment of choice and its corresponding sleeve.
Unlike the landmark identifier 18 shown in FIG. 9, the landmark identifier 2016 depicted in FIG. 9A does not require the second sensor 20 as shown in FIG. 9 since the origin of the global space (the area in which the electromagnetic field is generated) can be defined within the landmark identifier 2016. One axis of the global space co-ordinate system can be the longitudinal axis of the drill sleeve or other component 2022. In that event, the other two axes of the global space co-ordinate system can be defined by planes orthogonal to that longitudinal axis and to each other. Advantages of incorporating the field generator into the landmark identifier 2016 include a smaller size field generator because it can be brought into the local working space (area which includes the landmarks such as implant holes that are to be targeted for screw placement) therefore requiring a smaller electromagnetic field. The global space and local working space become the same or at least correspond more closely spatially when the landmark identifier 2016 with its field generator brought into the vicinity of the landmark, implant or probe sensor (not shown). Since the electromagnetic field size requirement is smaller, the induction coils within the field generator can be smaller which therefore reduces the size and weight of the handheld field generator to make it more manageable for handheld usage.
The material selection for the landmark identifier 2016 which houses the field generator can be optimized for weight and stability after multiple autoclave cycles. Any autoclavable material can be used, and the materials are preferably non-magnetic or weak magnetic to avoid or minimize interference with the electromagnetic fields. Exemplary materials include ceramic, CoCr, plastic or combinations thereof.
FIGS. 10-12 illustrate exemplary methods of electrically connecting the implant 30 to the insertion handle 40, which has corresponding electrical contacts. In FIG. 10, biasing elements 72 bias contacts 70 toward the insertion handle 40. In FIG. 11, the implant 30 has elastomeric electrical contacts 74. In FIG. 12A, wires extending between the lead 50 and another component are crimped together at junction 76. In one method, the wires are torn free and separated at the junction 76 after installation of the orthopedic implant assembly 28. In yet another method, the wires are cut above the junction 76 after installation of the orthopedic implant assembly 28. In FIGS. 12 B and C, two flex boards 53 are soldered together one or more pads 57 to connect a wiring harness 55 to the sensor. The wire harness 55 may be mounted to the insertion handle 40 or within a cannulation of the insertion handle 40. In the depicted embodiment, four pads 57 are soldered together. Locking tabs 59 are sandwiched between the implant 30 and the insertion handle 40 to withstand abrasion and tension associated with the implant insertion. Once the insertion handle is removed, the wire harness 55 can be pulled such that all non-biocompatible materials are pulled with it. In FIG. 12D, rings 61, 63 are connected during manufacturing. After implantation, both rings 61, 63 are removed by pulling on a jacketed wire 67.
Referring now to FIGS. 13A and B, the implant 30 and/or the insertion handle 40 may include one or more alignment features 44 and mating notch 80 or alignment pin 46 and mating hole 82. The insertion handle may be configured to align with an upper surface of the implant. In one embodiment, the insertion handle may have a key configured to mate to a slot on the implant. Other alignment guides may be used. In addition, the guide may have an electrical connector configured to mate to an electrical connector on the implant. The connection between the guide and the implant may be spring loaded to ensure electrical contact between the electrical connectors. In order to avoid shorting the connection between the guide and the implant, the electrical connector may be insulated. As another example of electrically connecting the insertion handle to the implant, the electrical connectors may include a post and slip rings. The rings may be located on the implant, and the posts located on the insertion handle. The posts are biased to contact the rings. In such an embodiment, the angular location of the insertion handle relative to the axis of the implant is not fixed. This would allow the insertion handle to be positioned to the implant irrespective of angular position.
In another embodiment shown in FIG. 13B, the implant 30 and/or the insertion handle 40 may include one or more alignment pin 47 and mating hole 83. The alignment pins 47 may be spear tip pins designed to engage a single time and when removed, the pins grip portion of the implant to remove all non-biocompatible materials with them.
Any of the electrical connectors above may include a memory storage device (not shown) for storing offset values for sensor calibration. Referring now to FIG. 14, the implant 30 and the insertion handle 40 may be sized such that space remains available for the first connector 52 even when the components are assembled or mated.
As an example, the system for identifying landmarks may be used to target blind screw holes of an implanted intramedullary nail. The intramedullary nail is implanted in the patient. The electromagnetic field generator is activated. The processor receives signals from the sensor mounted to the intramedullary nail and from the sensor mounted to the landmark identifier, such as a drill sleeve. A computer program running on the processor uses the information of the at least two sensors and graphically display them in relative position on the monitor. A surgeon moves the landmark identifiers into position using feedback provided by the processor. When the landmark identifier is in the proper location, the surgeon drill through bone and the intramedullary nail to create a screw hole. In some embodiments, the processor may provide feedback as to the depth of the drilled hole. The surgeon may then place a screw through the drilled hole to affix the blind hole of the intramedullary nail.
FIG. 15 illustrates another disclosed system 110 for identifying landmarks. The system 110 may include a processor 112, a landmark identifier 118, and an orthopedic implant assembly 128. In some embodiments, the system 110 may also include a monitor 114 and an insertion handle 140.
The landmark identifier 118 is used to target a landmark. The landmark identifier 118 may include a second sensor 120. In the embodiment depicted in FIG. 15, the landmark identifier 118 is a drill sleeve with a serrated tip 122, a tube 124, and a handle 126. In the depicted embodiment, the second sensor 120 is oriented relative to an axis of the tube, which may receive a drill. This offset of the sensor from the tube allows the position of the tube to be located in space in six dimensions (three translational and three angular) relative to the transmitter or another sensor in the system. In some embodiments, the processor may need to be calibrated to adjust for the offset distance of the second sensor 120.
The description continues in the full USPTO document.
 Lapsed, fee not paid9 drawings